Instagram Reels are statistically more effective than Posts and Stories combined when it comes to reaching audiences, so it's important for brands to take their Reels strategy seriously.
Reels are Instagram's answer to TikTok videos and carry a lot of value for brands. When users open the Instagram app, they'll often gravitate towards Reels.
However, Reels can also be time-consuming to create and end up dominating your social media output. It's therefore important to plan your Instagram strategy and make efficiencies where you can – and a great place to do this is by scheduling Reels.
That’s right. You can schedule Reels weeks in advance and free up time and resources for other things.
There are several ways to do this. One is to go via the app, another is to use the scheduler in the Meta Business Suite, and a third is to use software like Brandwatch to make the process as smooth as possible.
This guide will examine the three ways to schedule Instagram Reels ahead of time so you can cross multiple jobs off your list at once.
In this guide
- How to schedule Reels on Instagram
- Is scheduling Instagram Reels worth it?
- Best practices for scheduling Instagram Reels
- Frequently asked questions
How to schedule Reels on Instagram
Scheduling Reels on Instagram is relatively easy. Your Instagram profile is where you can utilize various features for scheduling and managing content effectively. You have three options:
- Via the Instagram mobile app - The built-in scheduling tool is perfect for basic needs and if you need to schedule a Reel quickly
- Via the Meta Business Suite - This free tool from Meta (which owns Instagram) has more advanced scheduling features than doing it via the app
- Via third-party scheduling tools - Paid options like Brandwatch come with many extra features. They’re perfect for professional accounts and for scheduling in bulk
No matter which option you choose, the aim is to stay organized and maintain a consistent posting schedule. Consistency is crucial to ensuring your brand delivers the right message and tone every single time. You can plan your content calendar in advance and post at optimal times when your audience is most active.
Scheduling Instagram Reels using the Instagram app
Scheduling Instagram Reels on the app requires a professional account. Simply open the app and tap on the plus icon to create a new Reel. Select your video and edit it on the app, adding any music, text, or effects. After that, tap “Next” to add your caption, tags, and location.
At this point, you’d usually publish your Reel and it would go live on your account. But, to schedule, scroll down to “More options” at the bottom of the screen. Click to open a new page, where you’ll see a button to “Schedule this reel”. You can then pick a date and time to schedule, up to one month in advance.
Then go back to the previous screen and hit “Next” to confirm. Your Reel will automatically publish at your selected time and date.
Scheduling Instagram Reels with Meta Business Suite
To schedule Reels via the Meta Business Suite, you’ll need to first connect your Instagram account to your Facebook page. You’ll see the option to "Create Reel" across the top bar of your Business Suite home page. Click on that button and you'll be taken to a fresh page where you can upload your video as a Reel. Then add your description and include URLs from any collaborators you have worked on the content with.
You can also choose a Reel thumbnail, either by selecting a frame or uploading your own image. Your video might take some time to upload to Meta but, when it's fully uploaded, you'll be able to edit it. Make sure you trim it to no more than 180 seconds. Add audio, crop the video, provide text overlays, and use the audio enhancement feature to improve sound quality. Click "Next" when you're done editing.
At this point, you can choose your scheduling options. Click on the "Schedule" tab and select the time and date you want to publish. You can't publish more than a month in advance. Once you're done, hit the blue "Schedule" button at the bottom right of your screen to schedule the Reel.
Remember, it is important to review your Instagram insights and Reels statistics to determine the optimal time to post Instagram Reels based on follower behavior. This can be done via the Business Suite.
Using third-party tools for scheduling Reels
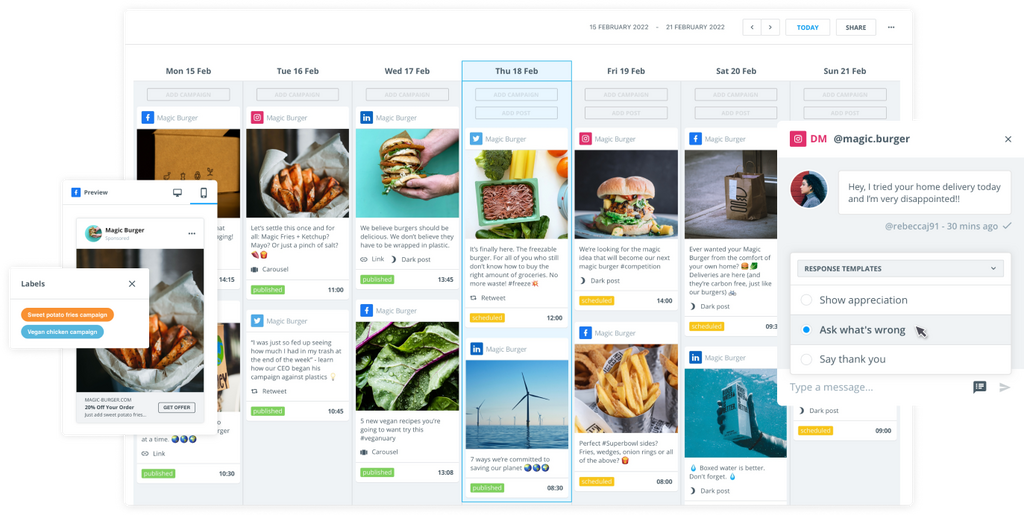
The third option is to use tools like Brandwatch to manage your Instagram account and schedule Reels on a much more versatile platform. The benefit is that you can see all your content in one place (including from other social media channels) and access enhanced performance analytics to see how your Reels and other content are performing.
Using a selection of Brandwatch tools, you can also create automated scheduling processes, upload in bulk, collaborate easily across your team, and work with influencers.
If you’d like to know more, book a meeting today!
Is scheduling Instagram Reels worth it?
Creating an Instagram Reels schedule is one of the most efficient ways to maintain a regular, consistent level of production. Instead of posting content manually each day, you can plan and schedule a week or a month's worth of Reels in one sitting. This saves a lot of time (and therefore money).
What’s more, creating a consistent posting schedule helps grow your audience and boost engagement. Audiences like consistent content because it’s easier to recognize the brand and build trust in the quality, improving brand perception. Various tools allow users to schedule content for Instagram Reels, offering advantages in content management and team collaboration.
Instagram’s native scheduling tool lets you schedule up to 25 Reels per day. You can plan content up to a month in advance, which helps you maintain an organized content calendar.
Key benefits of scheduling Reels:
- Better time management (cost saving)
- More consistent posting
- Strategic content planning
- Optimal posting times
- Reduced daily stress
What’s the best scheduler for me?
Choosing your method for scheduling Instagram Reels requires some research. You need to think about what you plan to post and how often you’ll do it. If you’re a small brand or a micro influencer who is just starting out, then editing and scheduling Reels on the Instagram app might be suitable.
For bigger brands and those with a Facebook account, it might make sense to schedule via the Meta Business Suite. This way you can also post on Facebook and access a lot more data than via the Instagram app.
If you really want to dig into the data, understand your audience, and share workloads across your team, then a third-party tool is the best option. You can easily weave your Instagram Reels schedule into your broader content strategy, track performance markers, and share analytics reports.
Best practices for scheduling Instagram Reels
No matter whether you’re planning to schedule Reels, Posts, Stories, or anything else, it’s really important that you adhere to some best practices. By weaving some simple habits into your workload, you’ll be able to create far more effective social media campaigns that actually resonate with your intended audience.
Here are some quick tips on how to schedule Reels properly.
Choose the best time to schedule Reels
Check your Instagram Insights or analytics on your third-party tool to find when your followers are most active. This data shows exactly which hours and days get the highest engagement, so you can align your schedule.
Peak engagement times vary by industry and audience location. Be ready to test different posting times to see what works.
From here you can create a content calendar that maps out your posting schedule.
Optimize your scheduled Reels for better performance
Make sure you spend time on each Reel to ensure it achieves what you want. There’s no point scheduling 15 Reels over a one-month period, only for each one to be poorly optimized. Utilize Instagram's “tap schedule” feature to set a preferred date and time for posting Reels, but be aware of its limitations and consider alternatives for a more robust scheduling experience.
Write captions and use hashtags relevant to your content and that connect with your audience. Ensure the opening three seconds of your Reels grab the attention of viewers, and try to keep your videos to no longer than 30 seconds. You can stretch to three minutes but your audience might not want to stay engaged for that long.
Also, add subtitles. This helps your Reels be more accessible to those who are hard of hearing, or those who are flicking through Reels with the sound off. What’s more, Instagram users generally stay more engaged when there are subtitles on screen as they are more eye-catching.
Avoid common mistakes when scheduling Reels
There are also a few mistakes you should avoid when scheduling Reels on Instagram. Don’t schedule too many videos back-to-back. Space them out by at least four hours. If you flood your followers' feeds then you risk overwhelming the audience you want to connect with.
Always check your scheduled Reels are of the highest possible quality after they’ve been uploaded. Social media managers can sometimes overlook quality in favor of quantity – just make sure your Reels are consistently hitting the mark.
With that in mind, it’s also important to step back from your calendar and assess your upcoming schedule. Is your calendar fully optimized or could you be placing some Reels at better times in the week?
Remember, a scheduling tool is there to help you manage and publish Reels in bulk, or when you’re away from your Instagram account. Be sure to monitor it like you would for any other content and you’ll soon feel the benefits.
Frequently asked questions
Scheduling Instagram Reels requires different steps depending on your scale, device, and preferred method. Users will probably start with the Instagram app, while brands may choose to manage their schedules in the Meta Business Suite or a platform like Brandwatch.
Below, we answer some questions about the essential details about scheduling options, troubleshooting, and using various tools.
How can I schedule Reels on Instagram using my iPhone?
Open the Instagram app and tap the plus icon to create a new Reel. Select your video and edit it on the app. After creating your content, tap "Next” and add your captions, tags, etc.
Then click on “More options” and push the "Schedule this post" button. Choose your desired date and time. You can schedule up to a month in advance. Then go back to the previous screen and hit “Next” to confirm. You're now ready to press “Share”.
What steps are required to schedule Instagram Reels from a computer?
There are two ways to schedule Instagram Reels on a computer. The first is to sign in to the Meta Business Suite on your browser and select "Create Reel."
Upload your video and add your description. Add a thumbnail, crop your video, add any text overlays, and include music if you wish. Click the "Schedule" tab and select your preferred time, then go back and hit the "Schedule" button at the bottom right of your screen to schedule the Reel.
You can also schedule Instagram Reels on third-party tools like Brandwatch. You’ll need to sign up to the platform and link your Instagram account. The tool is perfect for overseeing all your Instagram content along with your content across other channels and includes a calendar, scheduling functions, and much more.
What should I do if the option to schedule Reels isn't appearing on Instagram?
You can only schedule Reels if you’re using a professional or business account. Regular personal accounts can't schedule posts. If you still can’t access the schedule function, try updating the latest version of your Instagram app. If the problem persists, contact Instagram.
Is there a way to schedule Instagram Reels without incurring any cost?
Both the Meta Business Suite and the Instagram app allow you to schedule Instagram Reels for free.
Can I schedule Instagram Reels directly through the Instagram app?
Yes, the Instagram app lets you schedule Reels if you have a professional account. It’s easy to do and you can schedule multiple posts per day through the app. You can also schedule up to a month in advance.